Table of Contents
VOIP (FreePBX)
 If you’re interested in having your own mesh phone extension on our local PBX, please reach out to our Groups.io.
- Here is our local phone directory and voicemail.
- We have a bi-weekly AREDN net every other Sunday at 7pm on our conference line, and zoom meetings on the other Sundays.
- More information from arednmesh.org
- More information from this Groups.io thread.
- N2MH has a lot of information on his AREDN page, and maintains global white pages.
The following instructions are to connect to our local PBX. However, it's also possible to make direct phone-to-phone connections without a PBX. Instructions are here.
Cisco SPA525G2 Setup
Most of our users have Cisco SPA303 or SPA5xx series devices, however any IP Phone with SIP firmware will function.
IP Address
After connecting the phone into the hAP:
- Navigate to the
Port Forwarding, DHCP, and Servicespage and note the IP address of your phone. - The Hostname will be different and will be setup later in the phone settings.
- At the end of the setup, we'll come back to this page to add the DHCP reservation (but not yet).
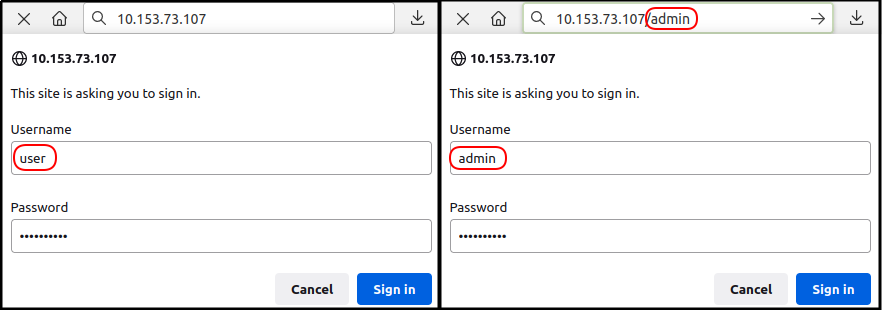
- Now use your IP address and navigate to http://10.xxx.xxx.xxx/admin/advanced

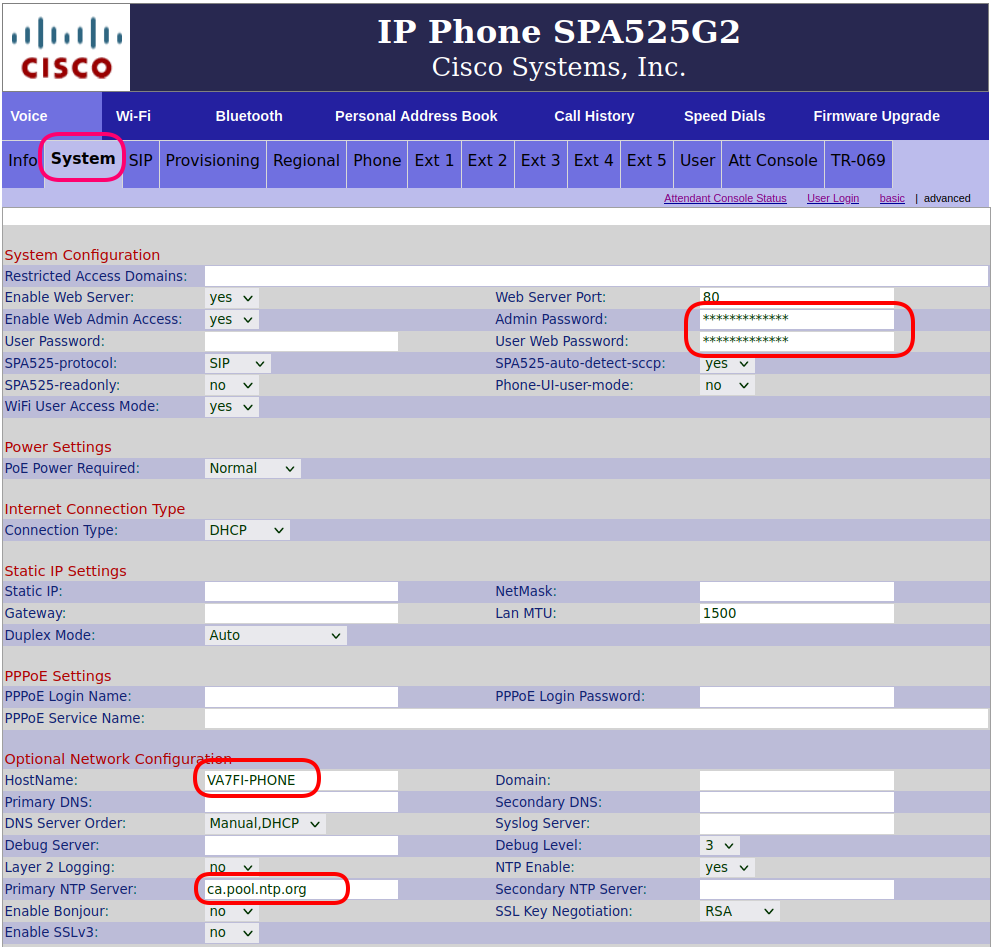
System
Click on System tab.
- Enter an (optional)
Admin Passwordand/orUser Web Password. But note that:- the
Admin passwordwill be required to navigate to http://10.xxx.xxx.xxx/admin with the usernameadmin. - And the
User Web passwordwill be required to navigate to the other pages with the usernameuser.
- Enter your
HostName - Enter the following
Primary NTP Server: ca.pool.ntp.org - Don't click Submit All Changes yet.


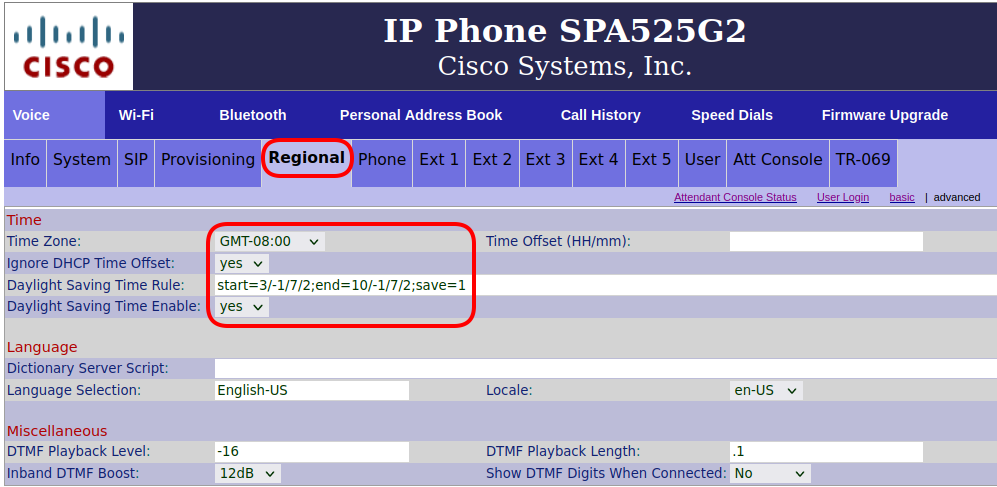
Regional
Click on the Regional tab.
- Scroll to the very bottom of the page and ensure the Time settings are correct:

Phone
Click on the Phone tab.
- Enter the
Station Name,Voice Mail Number: *97, andStation Display Name - Enter
Line Key 1information with your callsign and extention number Line Key 2toLine Key 5are quick dial buttons. TheExtended Functiontext is of the formfnc=blf+sd+cp;sub=2400@$PROXYwhere the number (here 2400) is the extension number.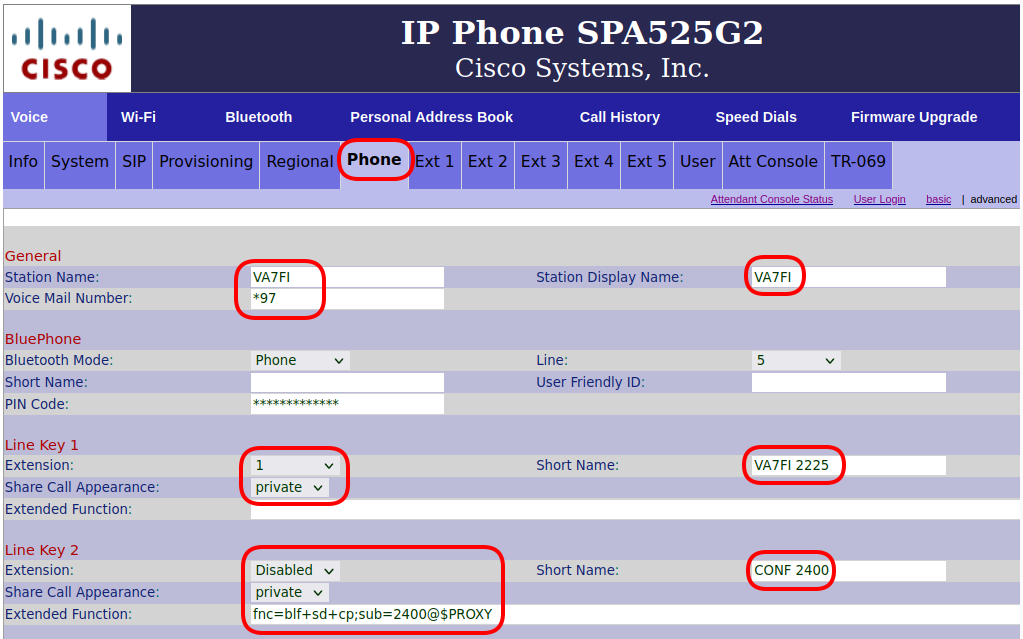

Ext 1
Click on the Ext 1 tab.
- Under the
Proxy and Registrationsection, enter the following IP address:10.160.14.252 - Under the
Subscriber Informationsection, enter- Your
Display Name - The
Passwordthat was assigned to you by Kyle, VE7ODG - Your extenssion as the
User ID
The IP address of the new PBX was changed from 10.246.225.227 to 10.160.14.252 on April 2025. The screenshot below shows the old address.

Att Console
Click on the Att Console tab
- Change the
Server TypetoAsterisk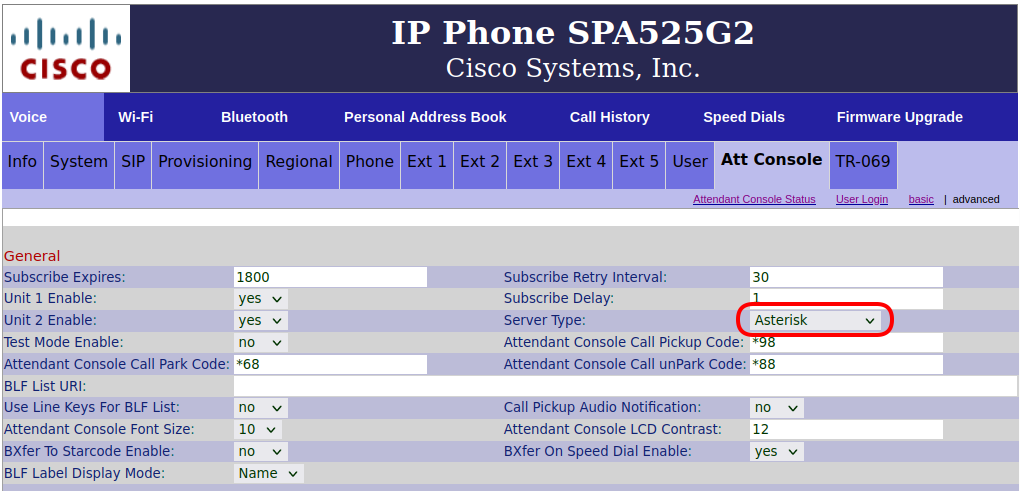
- If you have an Attendance Console (sidecar) and would like to program the speed dial buttons, follow the example here. Make sure you change the extension number and the name for the contact you want to add. Here's a printout for the SPA500S Sidecar.
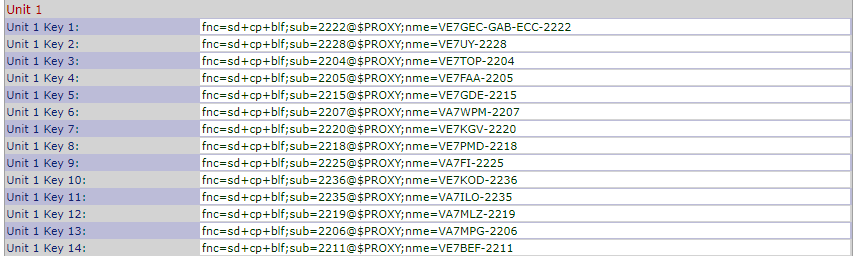
- Here is a copy and paste example of the code:
fnc=sd+cp+blf;sub=2202@$PROXY;nme=VE7LSE-2202


Saving Changes
- It's alost time to save the changes, but first, make sure you remember your
adminanduserpasswords on the System tab. You'll need them to come back to the settings after your phone reboots. - Click on Submit All Changes when ready and what for your phone to reboot.
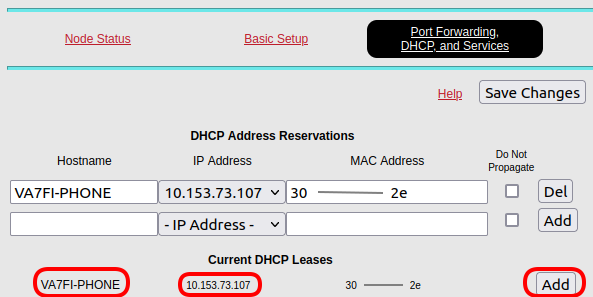
DHCP Reservation
Now that the phone is all setup, go back to your hAP settings and
- Add its address to the DHCP reservation.
This step ensures that if the hAP reboots and starts giving out IP addresses to your connected devices, it'll keep the same one for your phone. This is important because if your phone gets a different IP address from the hAP, the phone settings won't match anymore.