Table of Contents
IP Direct Calling
The following instructions1) are to make direct IP-to-IP calls using the Cisco SPA525G or SPA504G phones. For instructions on using our local PBX, see the instructions are here.
General Notes:
- All steps are done as Administrator on the advanced page.
- This setup will configure the last extension and line key for direct IP dial calls and leave extension 1 / line key 1 for PBX calls.
- It may be a good idea to
Submit All Changesafter each step but it also may be unnecessary. - Outgoing calls may be placed from the personal directory, speed dial buttons or the dial pad. When using the dial pad, end the IP address with a # character. This will send the call out immediately.
- If you like, you can publish your phone’s IP number on the mesh status page so others can add your phone directly.
- If you are replacing an existing speed dial button with the new direct dialing Line, make sure to remove the previous info in the
Short NameandExtended Functionsboxes.
SPA525G
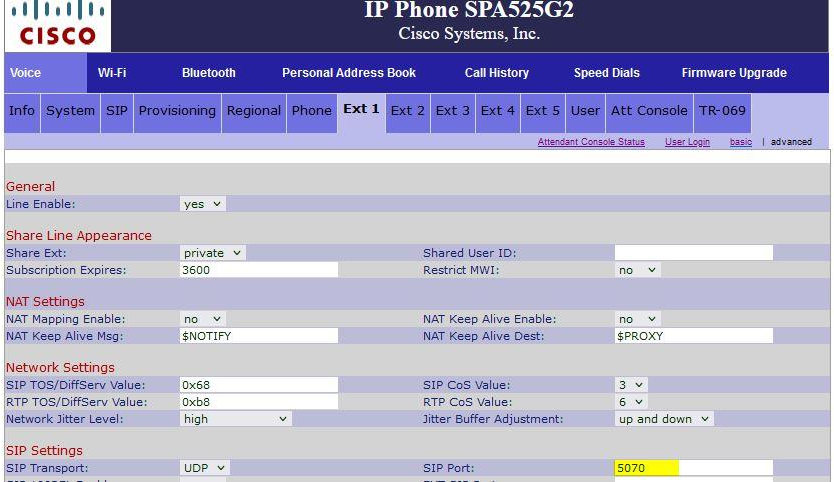
Ext 1 tab
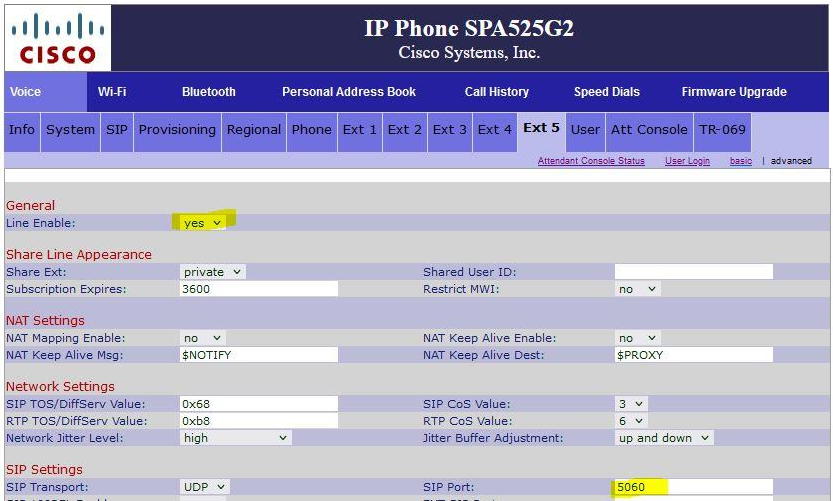
Ext 5 tab (or any free Ext you want to use)
- General
- Line Enable:
yes
- SIP Settings
- SIP Port:
5060
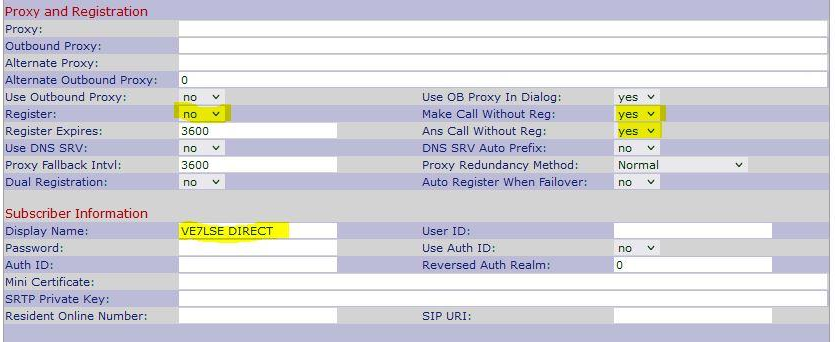
- Proxy and Registration
- Register:
no - Make Call Without Reg:
yes - Ans Call Without Reg:
yes
- Subscriber Information:
- Enter your Call and Direct for example
- Dial Plan
- Dial Plan:
(x.<*:.>x.<*:.>x.<*:.>x.) - Enable IP Dialing:
Yes
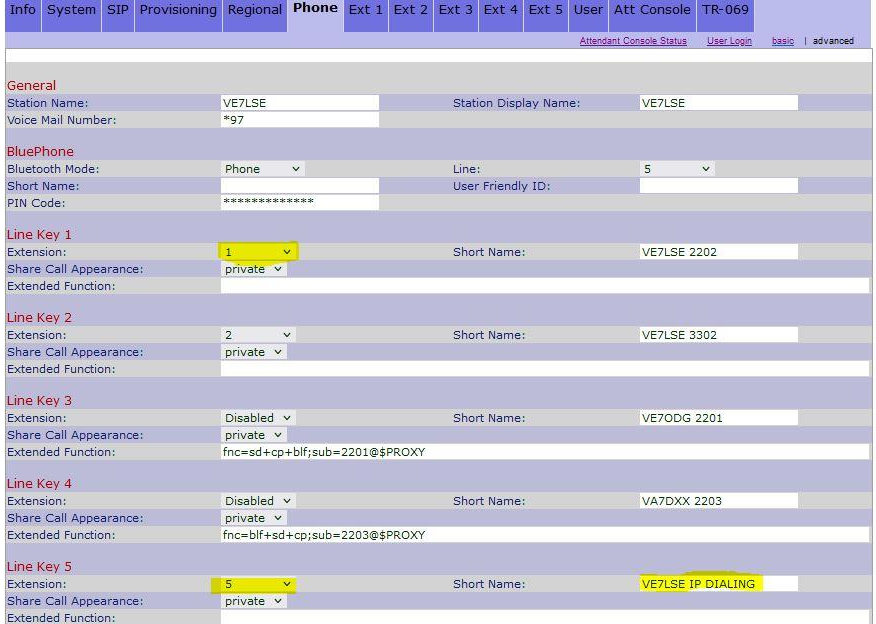
Phone tab
- Line Key 1
- Extension:
1
- Line Key 5
- Extension:
5or your preference Line Key
Make sure your line keys do not have anything entered for extended Function.
Outgoing Direct-IP dialed calls
Personal Directory
This section is done on the phone itself. To add to the directory:
- Press your line key that is setup for direct dialing
- Dial IP of the phone you want to call (using the * key as a
.)
For example, to enter10.10.123.123, key in: 10*10*123*123 - Press Dial to make sure it works.
- Navigate to
2. Call History - Navigate to
4. Placed Calls - Navigate to the call you just placed using the IP Address
- Press the Option button.
- Navigate to
Add to Address Book - Enter the info you want in there then press Save
The reason for this method is that the SPA525G does not recognize an IP addressed entered into the web interface when adding a directory entry. If anyone figures out a work around, please let us know.
How to add direct IP contacts to your speed dial buttons on your phone’s spare line keys or Attendant
Console keys:
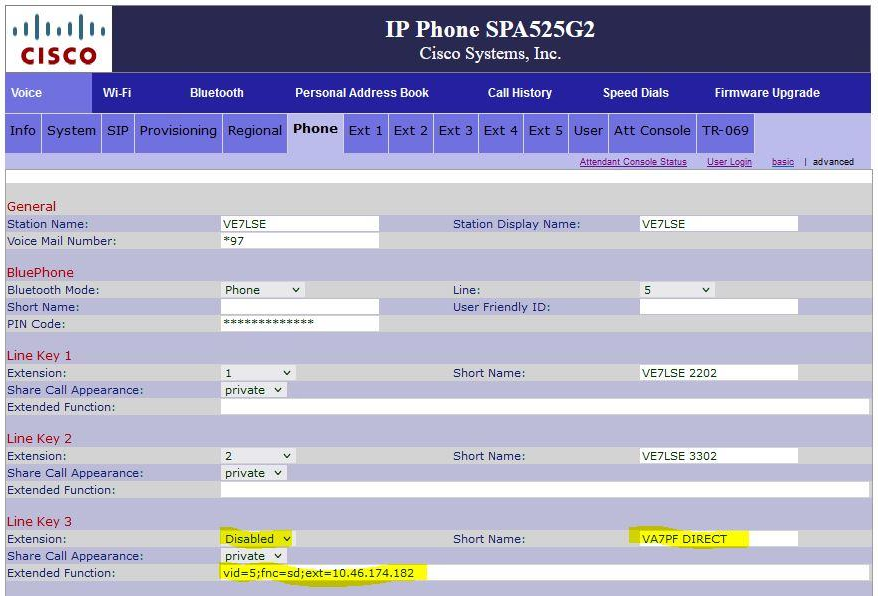
Phone
- Line Key x
- Extension:
Disabled - Short Name: Enter a short name
- Extended Function: Enter something like:
vid=5;fnc=sd;ext=10.46.174.182
vid=5refers to the line key used for this speed dial button- Change the IP address and name to the correct one you are trying to add
ATT Console
- Cut and paste this example into a free “Unit 1 or Unit 2 Key”:
vid=5;fnc=sd;ext=10.46.174.182;nme=VA7PF DIRECT
SPA504G
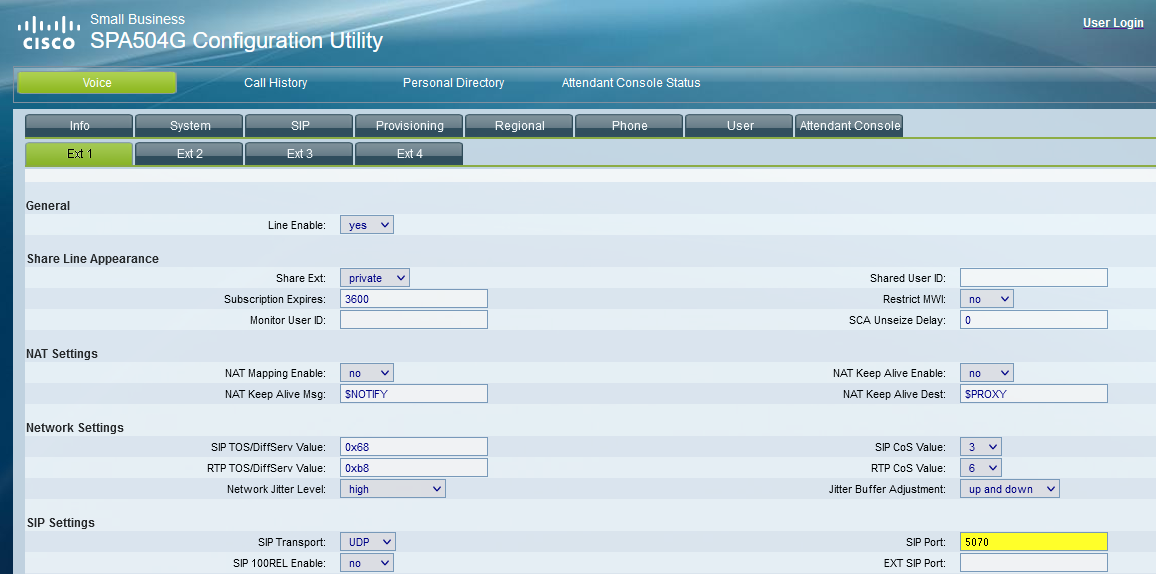
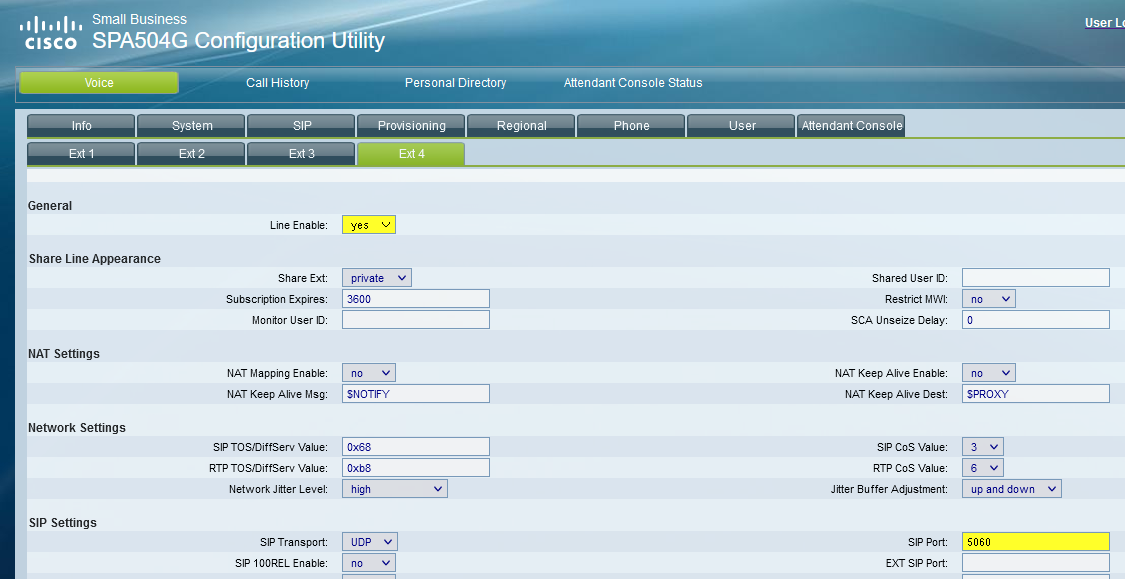
Ext 1 tab
Ext 4 tab or any free Ext you want to use
- General
- Line Enable:
yes
- SIP Settings
- SIP Port:
5060
- Proxy and Registration
- Register:
no - Make Call Without Reg:
yes - Ans Call Without Reg:
yes
- Subscriber Information
- Enter your Call and Direct for example
- Dial Plan
- Dial Plan:
(x.<*:.>x.<*:.>x.<*:.>x.)
- Enable IP Dialing:
Yes
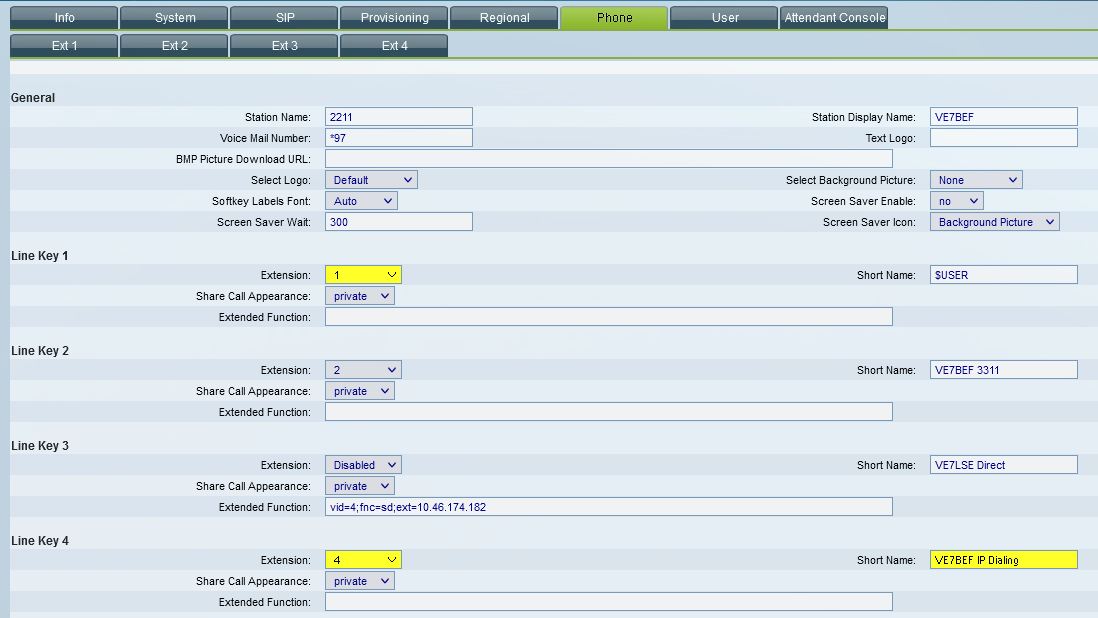
Phone tab
- Line Key 1
- Extension:
1
- Line Key 4
- Extension:
4or your preference Line Key
Make sure your line keys do not have anything entered for extended Function.
Outgoing Direct-IP dialed calls
Personal Directory
In each box, place an entry for each desired phone. Examples:
n=VE7LSE;p=10.1.2.3
n=N2MH;p=10.73.73.66
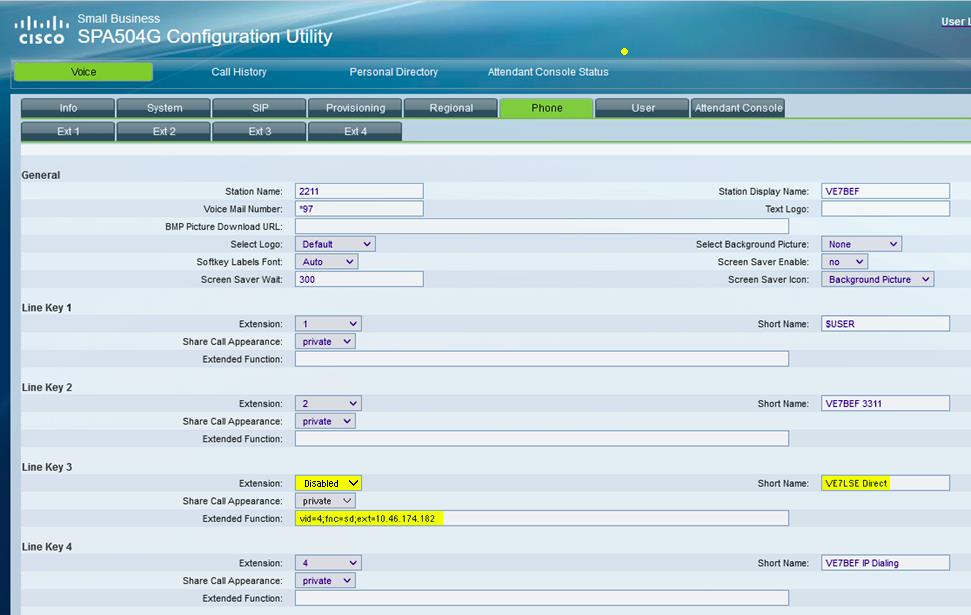
How to add direct IP contacts to your speed dial buttons on your phone’s spare line keys or Attendant
Console keys:
Phone
- Line Key x
- Extension:
Disabled - Short Name: Enter a short name
- Extended Function: Enter something like:
vid=4;fnc=sd;ext=10.46.174.182
vid=4refers to the line key used for this speed dial button- Change the IP address and name to the correct one you are trying to add
ATT Console
- Cut and paste this example into a free “Unit 1 or Unit 2 Key”:
vid=5;fnc=sd;ext=10.46.174.182;nme=VA7PF DIRECT

